Welcome to the Body Tracking module! We will be looking at the fundamental concepts and methods of body tracking specifically for the web. There are different ways to track body movement and depth using devices such as Microsoft Kinect machines, depth cameras such as Intel RealSense as well as webcams with machine learning.

There are a number of artworks that use body and depth tracking to detect movement for interaction with the works.
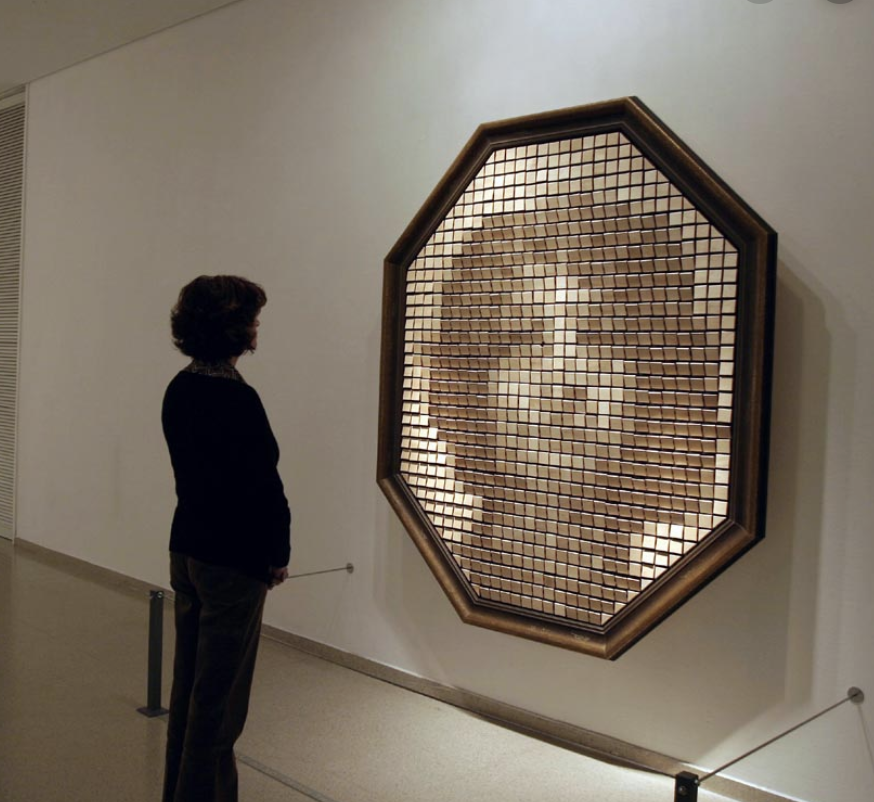
Text Rain, created by Romy Achituv and Camille Utterback is one of the earlier works that track the positions of the bodies to allow people to interact with the falling rain of texts. Daniel Rozin’s
Wooden Mirror
uses the Kinect V1 device to detect the depth of the objects or people in front of it to turn the individual wooden pieces of the mirror. Some more contemporary works that use body tracking include Daito Manabe’s work such as
Dynamic VR Display
(this piece uses a more complicated method of real time motion capture).

Before You Start Coding
In this module, with the constraint of creating a web-based experience, we will focus on how to track bodies with the PoseNet machine learning model and a webcam.
Before we go further, you will want to brush up on your understanding of
arrays
and
loops, which are the two fundamental concepts to body tracking and PoseNet. Once you are comfortable with these concepts, you can move on to the main part of the assignment.
Body Tracking = Numbers
What is important to know about body tracking is, at the end of the day, you will be using a set of numbers that represent different positions of the tracked body. These numbers come inside of an array per body tracked. Within this array of points per tracked person, there are arrays per key feature positions detected. Thus, the key to using body tracking for creating visualizations is to know how to maneuver within these arrays of arrays to figure out which ones contain the numbers that you want to use to create visualizations.
The required materials provided below will help you understand the structure of data that will be available for your use. But the most essential thing that you need to know is that the tracking is done for you - use the numbers that are given to you to control elements in your sketch! Just like how you can use mouseX and mouseY variables to control elements with your mouse!
One a side note, when using PoseNet, if you ever see an error that says:
Uncaught ReferenceError: ml5 is not defined (sketch: line 24)
This means that you don’t have the ml5 library included. If this happens, open the index.html file and make sure that it looks like the below screen capture. There should be a line that says:

Required Materials
The main material of this module is
ml5.js PoseNet tutorial video
and it’s
accompanying example code.
You only need the main tutorial video to complete the assignment but you might also review this older
Hour of Code with p5.js and PoseNet
video. It shows how to use functions like
lerp()
and
dist()
to create a smooth movement of the red ellipse following the nose position. If you want to explore a simpler version of drawing shapes at a keypoint of the, see this
sample code
and
this one.
The Hour of Code video the video tutorial was recorded before a new feature was added to ml5 that allows you to reference a keypoint by its name rather than its index (this feature is covered in the main tutorial video).
let nose = pose['nose'];
let rightEye = pose['rightEye'];
let leftEye = pose['leftEye'];
Optional:
For more in depth information about PoseNet and its development process, you can read Dan Oved’s Medium post,
Real-time Human Pose Estimation in the Browser with TensorFlow.js. I also encourage you to look at
this list of keypoints
that are available for you to use to get an idea of what you can create with PoseNet.
To track all available positions of the tracked bodies, you can use a for-loop to iterate through all the detected points. See
this example code
that draws a red ellipse on top of all tracked positions for each body.
Assignment
Your assignment for the Body Tracking Module is:
Watch the
ml5.js PoseNet tutorial video
(accompanying example code)
Take a look at
sample 1
or
sample 2, duplicate the sketch and create a virtual mask using positions of facial features (nose, eye and ear positions). If you are feeling up for an extra challenge, create more visual elements that follow positions of the rest of the body (shoulder, elbow, wrist, hip, knee, angle).
Share your sketch as a new post on this week’s discussion board. Write a ~ 200 word description about what you made and your process. You can write anything, but if you’re stuck here are some guiding questions:
What did you originally intend to create?
Narrate the process of creating your sketch.
What resources and examples did you draw on to create your sketch? What was most helpful / least helpful from this week’s materials.
What problems/discoveries did you encounter along the way?
Paste the link to your discussion post (not just the code) as your assignment submission.
Please also write a short response on at least two other classmate’s sketches on the forum. Review the Feedback Guide (especially the “Content” section) for ideas on what to talk about. Note: It’s okay to do this step after the deadline, when everyone has submitted!